Published Date: March 7, 2022
Last Updated on March 7, 2023 by Camper Front
An RV is all fun and games until it’s time to get rid of the water in the tanks. This is where some expert knowledge of how to hook up an RV sewer hose will come in handy. While it might sound messy and not-so-fun, hooking up an RV sewer hose is much easier than many people first realize.
We’re here to teach you everything there is to know when it comes to your RV and how to use the sewer house to dump the water and waste in your tank.
Before you get ready to hook up your sewer hose and empty your tanks, make sure you have all the necessary equipment including disposable gloves and eye protection. Doing this without protection or a secure connection can cause health issues down the line if you’re not careful.
Table of Contents
Know Your Sewer Hose
A hose for your RV is made from lightweight and durable plastic and is used to connect to your RV’s holding tank so that you can dump your black and grey water tanks.
These hoses are often called “black tank hoses”, “camper drain hoses”, “camper septic hoses”, “camper sewage hoses”, or even “camper waste hoses”. The jargon is largely the same and depends on where you are in the world.
The standard size for a sewer hose is about 3 inches in diameter. While most sewer hose valves and connections are universal, it wouldn’t hurt to keep a couple of size adapters on hand just in case.
A more expensive hose has smoother interiors, allowing the tank to dump more smoothly and clean out easier. Most hoses range from 10 to 20 feet in order to ensure that the RV reaches the dump site.
An RV sewage hose is different than a gray water drain hose, so make sure you know the difference!
What to Look For in a Hose?
You don’t want just any sewer hose. Let’s take a look at some of the main features that make a good hose.
A good rule of thumb: the easier to use, the better. You want to make sure you get a hose that is straightforward in terms of use. Overly complicated designs can make it harder to store and clean. You also want to make sure that it’s a durable design.
Secondly, you want to make sure that the hose that you have is easy to clean. Dumping your grey and black water tanks isn’t the most fun, and neither is cleaning the hose. You want to make sure that you can wash out any waste left behind.
Finally, there are some pretty important attachments that you want. For instance, a clear elbow is great for cleaning. It allows you to see when clear water runs through, making it easier to clean.
How to Attach RV Sewer Hose in 3 Steps
Let’s take a look at the installation process for your hose. Thankfully, this process is pretty straightforward to understand. You shouldn’t need any installation hardware beyond want comes with your hose and RV.
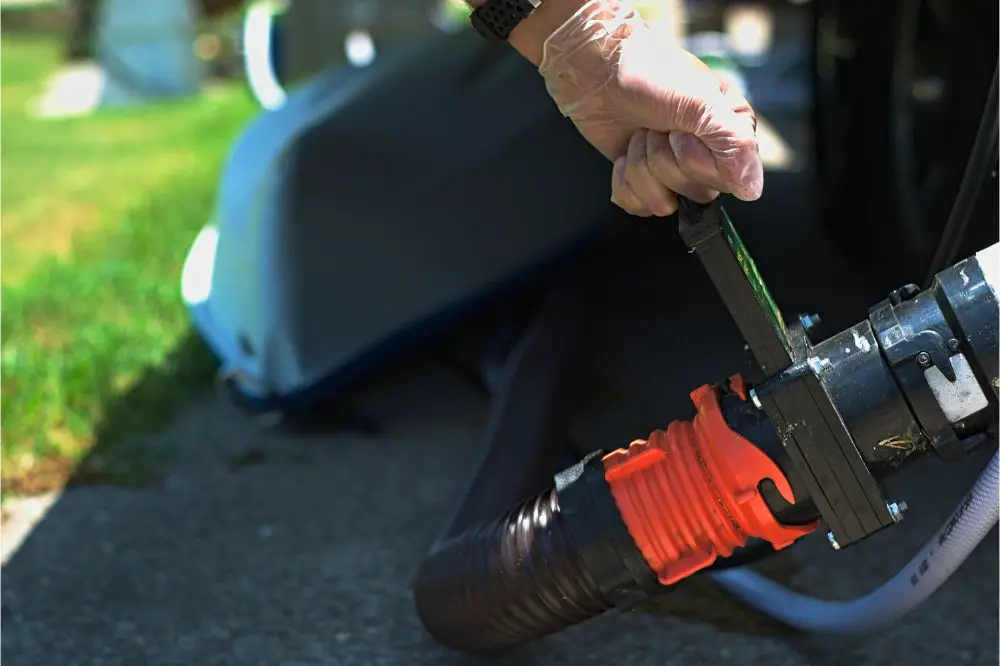
Step 1: Connect your sewer hose
The first thing you want to do is connect your hose to your RV. When looking at your RV hose, there should be two ends: one with an elbow fitting, sometimes called an elbow connector, and another end with a traditional bayonet-style fitting.
The bayonet-style fitting end is the part that connects to your RV waste-fitting sewer outlet. Attach it to your RV outlet connection. Make sure it’s secure. You don’t want any leaking grey water or raw sewage!
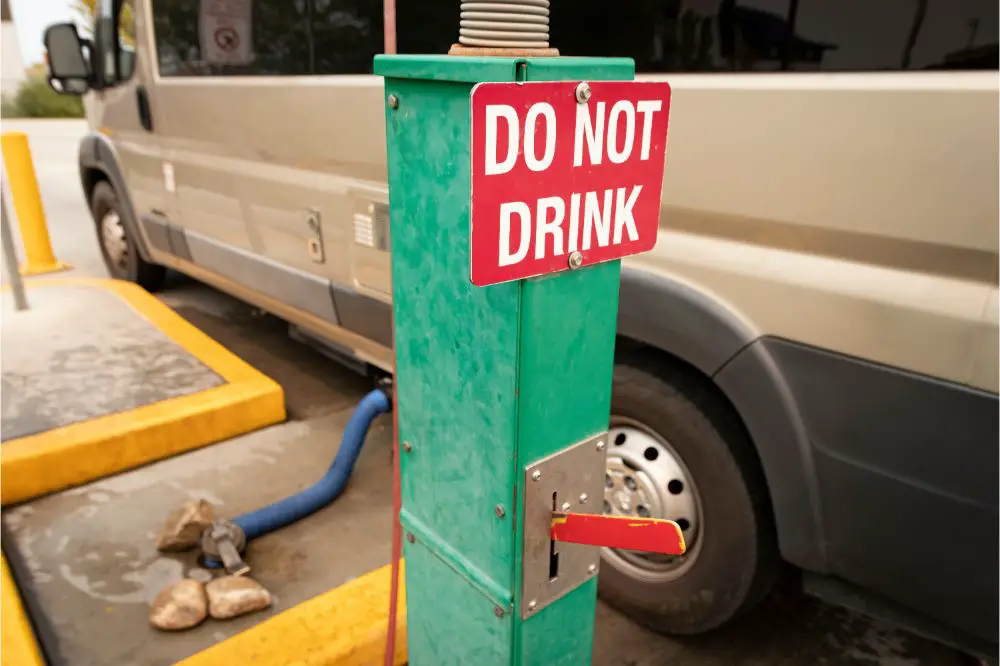
Take the other end of the hose and run it to the waste dump station inlet or campsite ground dump hole. Make sure that you have a gasket that can fit into the dumpsite inlet with a tight seal and tightened swivel fittings. You don’t want to make a mess for other people to deal with. There have been more than enough dump station horror stories for a lifetime!
Step 2: Drain your waste tanks
Once you have your hose secured to the sewer outlet, you’re now ready to open your waste tanks. Locate your tank valves. They should be right next to where you hook up your hose.
It’s important to do this part very slowly. Releasing the valves too quickly could cause an unneeded leak or even a backup into your hose. Double-check that your hose has a tight connection to the RV.
Start with the black water tank valve. You want to do this because any solid waste that gets stuck in the hose will be flushed out when you move on to the grey water tank valve.
As you release the black tank drain valve, make sure to keep an eye on the connections. Once you’ve emptied the waste valve, move on to the gray tank valve. Once both tanks are empty, close the valves.
Step 3: Disconnect and clean up
Now you can disconnect your hose and clean up. DO NOT disconnect the elbow end of the hose from the dump receptacle. You’ll still need it in order to clean up. Instead, disconnect the hose from your RV.
With the elbow end still attached to the dump inlet, use a garden water hose or another water source to clean out the inside of the hose, letting the dirty water run into the dump site. Once the inside of the hose is clean, you can rinse off the elbow connector and put your hose away.
Congratulations! You emptied your own dump tank!
Frequently Asked Questions
How does the RV sewer tank work?
RV sewers work differently from those in houses. Usually, unless you have a septic tank, the waste from your home flows into the city sewer. However, waste in an RV is held inside a tank that then has to be dumped. RVs have three tanks: freshwater, greywater, and blackwater.
Your freshwater tank is likely hooked up to a garden hose and a water source. This is the water you use for drinking, showering, and washing the dishes. Meanwhile, greywater is the tank that holds liquid waste, like urine. The black water tank holds your solid waste.
What can you flush in your RV toilet?
While you can usually flush toilet paper in your house toilet, you want to be more careful with your RV toilet. Most toilet tissue is too thick to safely be flushed town an RV toilet, though many manufacturers do make easy-to-dissolve 1-ply toilet tissue that works great for an RV.
Some RVs use what are known as composting toilets, which are considered a more environmentally friendly option than the traditional septic tank. However, you don’t want to put any toilet tissue in your compost toilet.
Can you connect two RV sewer hoses?
Yes. In fact, this is quite a simple thing to do. All you need is a Y-shaped hose connector. Some RVs have two different sewer hookups rather than one. You just need additional hoses: two to connect the sewer to the prongs of the Y hose and a third individual hose to connect to the dump station inlet.
Where can you dump your waste?
There are plenty of places to dump. Most campgrounds and RV parks have a designated dump station that is free to use for all guests. Many RV parks also have a dump station, usually several, so that nobody has to move their RV in order to deal with their dump situation.
If you’re on the move or traveling, almost all truck stops or visitor centers along major highways also have a dump station. If you’re on the road and still need to dump your waste, a truck stop is a perfect place to do so.
Conclusion
Now you know everything there is to know about how to connect an RV sewer hose. Always make sure you get a hose for camper use, check your hose length, and be sure to look at the other hose support options. A quality hose will be easy to use and easy to clean. You want your RV drain hose to be smooth on the inside, made of resistant hose materials, and lightweight but durable.