Published Date: December 29, 2020
Last Updated on June 22, 2023 by
The RV park septic system offers owners of recreational vehicle a facility where they can empty their gray and black water tanks. Even though they are mostly used by RVers, boats equipped with bathroom facilities can also make use of them.
An RV park septic system, therefore, helps to protect the environment because it creates a safe option for the dumping of RV holding tanks.
Depending on the dumping site you patronized, you may need to pay a fee before using the dump station. But how does an RV park sewer system work? This is something you need to know before trying to make use of one.
Table of Contents
How Does An RV Park Sewer System Work?
There are two different sewer systems in RVs and how they work differs:
1. Above the floor
The waste plumbing system of an RV is divided into two waste systems: the black system, which holds solid waste, and the gray system, which holds liquid waste from sinks and the shower.
The black waste system is usually made up of a 3-inch black PVC pipe that connects the toilet to the holding tank. However, in most RVs, pipes are not usually made use of, instead; the toilet flange is glued to a threaded fitting that is attached directly to the tank.
Some fifth-wheels have a connecting pipe that connects to the holding tank from an upper bathroom. But most of the time, the tank is vented through the roof.
The gray waste system usually has a 1½-inch black PVC pipe that connects each water fixture, sink, shower, and clothes washer to one or more gray holding tanks.
A p-trap or a hepvo device is usually put in place to prevent gas flowback. A hepvo is a waterless valve that helps to prevent gas and tank overflow liquid from flowing back up into the shower or sink
It is more beneficial compared to a p-trap, as water is not required to maintain the seal, which eliminates the chances of odor coming back up into the RV when water splashes out of the p-trap. Installing an hepvo also requires much less physical space and doesn’t require winterization.
Adequate ventilation is also required for the proper functioning of the gray waste system, in order for the tank to be vented and water drained properly. However, with the release of most modern RVs the number of roof fixtures by using small vents which are hidden in walls or cabinetry have been reduced.
Anti-siphon trap vent devices (astvd) are also attached to a vertical pipe that is placed near the appliance and also has a neoprene or rubber flap inside that opens up when there is a vacuum.
Higher-endrv models are spring-loaded. Astvds don’t require maintenance but in the case of an odor problem in the RV, especially from gray water, you may need to carry out some maintenance or even replacement.
For replacement, you can twist off the astvd using the threads. If the rubber has become misformed, you would need to replace the unit.
Most plumbing components in an RV are made of plastic, this helps to reduce any add-on weight on the RV but they rarely fail.
There are different models and styles of RV freshwater toilets on the market. They range from plastic economy models to full china-bowl electric-macerator flush models.
Some of which depends on a 1-inch rubber hose that is connected to the black-water tank, while others connect to the toilet flange on the floor.
The toilets usually have a two-position flush valve; the first which fills the bowl with water, and the second which flushes the bowl, this is activated by either a hand lever or a foot pedal. When the toilet is flushed, a sliding blade or ball valve opens up and this empties the contents down into the pipe.
An RV toilet flange is similar to the ones in a regular home, but rather than wax, the seal is made of foam rubber. Removing the toilet for any reason means the foam-rubber seal has to be removed also.
But, if it passes a careful inspection and can be reinstalled just as it was removed, then there’s no need for a replacement.
2. Below the floor
Usually in a regular home, the soil stacks run into the cellar or below the foundation and then out to the sewer or septic system, so once flush your toilet or open a drain it goes out of your house.
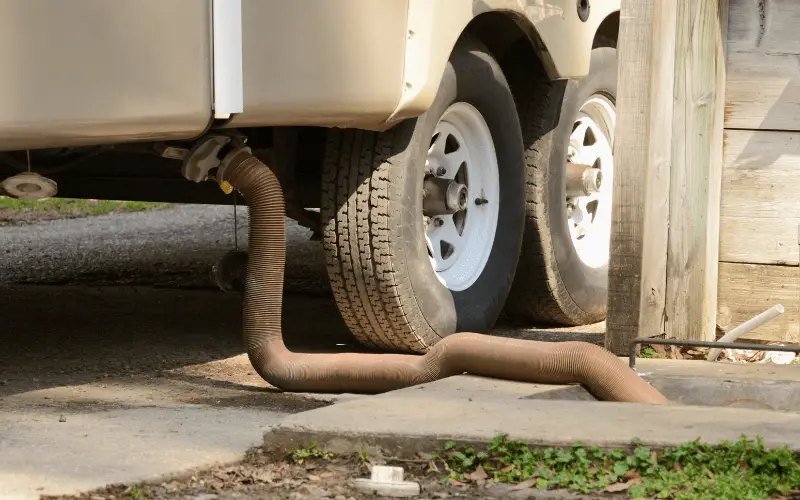
But in an RV, the wastewater is collected in holding tanks and there are two types of holding tanks, there is the gray for sink and shower water and black for sewage. Both tanks are piped to termination valves and a fitting to which the sewer hose is connected.
The holding tanks are usually made of polyethylene or abs plastic and depending on the type of tank, the pipe fittings can either be glued or spin welded in place. Both tanks are also vented through the roof via a 1½-in pipe.
Although there are majorly only two types of holding tanks some RVs have more than two holding tanks. This is done to accommodate certain floor plans, to create a plumbing slope and also to increase holding capacity.
For proper drainage of a waste pipe, a slope of at least 1⁄8-inch per foot has to be maintained, as required by the nfpa 1192 building code. Depending on the RV’s length and style, there may not be enough vertical drop for that slope to be maintained.
For example, an RV might only have 3 to 4 inches from the top of the floor to the top of the tanks. Because the tanks is placed right up against the bottom of the floor, the drain plumbing needs to be run above the floor, or, in the case of the toilet, drain directly into the tank.
If the waste facilities are placed far apart in the RV, installing multiple holding tanks might be the only solution. When it is configured this way, the waste systems are completely separate from each other.
Some motorhome manufacturers usually make use of macerator pumps to move waste from a passenger’s-side discharge tank to a driver’s-side sewage-dump connection, again, this is due to the omslope, and often a motorhome chassis is in the way of running directly to the discharge.
Some RVs are usually equipped with a black-tank flush; with aftermarket systems that can also be retrofitted, this is a great option, as it helps to rinse off solids stuck inside the tank.
The flushing system is usually connected with a garden-hose connection to the side of the RV directly into the flush nozzle through a hose/tubing and an inline vacuum breaker that helps to prevent any chance of backflow.
Line pressure works perfectly for a flushing system, and you can also make use of a hose for rinsing items that will not be used for potable water.
There are different lengths of gray hose which you can purchase from an RV-supply stores, or you can make one using an old hose but make sure it is properly marked and its purpose indicated.
A black tank’s discharge pipe diameter is 3 inches; while that of a gray tank is 1½ inches in most cases. If a gray tank happens to have its own sewer connection, it should have a 3-inch discharge pipe. The connection for the sewer-hose however, remains the same.
If you are making use of a “gray-water pit, you can get a replacement sewer cap with a garden-hose fitting. It is also recommended to make a ¾- or 1-inch hose using parts that can be purchased at your local home-improvement center for this purpose.
Although many RVs are marketed as being built for all-season use that is not always the case because most RVs can only thrive in mild weather conditions (both summer and winter) and sometimes cannot handle severe weather.
One-way manufacturers use to help accomplish this is by enclosing the dump valves and piping in a heated and enclosed underbelly, and also adding electric heating pads to tanks and plumbing.
Sometimes the dump valve can either be remotely controlled or electric but the basic design and operation of the valves don’t change.
A RV’s dump valves uses a sliding blade that helps to reduces the opportunity for clogging while being easier to disassemble and service.
When a RV system is built, a flange is attached securely using glue to the waste pipe on each side of the valve. Gaskets are also placed in a groove in these flanges, and the valve is inserted between the flanges and secured with four bolts.
In event where the valve fails to close, or if it leaks, fixing it is easy and pretty straightforward but you may need to drop the underbelly.
Termination valve sets, where both valves are attached to a joint sewer-hose connection, is also very common.
RVs with this type of connection, usually have their valves exposed to the outside air which makes them prone to freezing, to prevent this from happening some larger motorhomes have this type of connection in a heated compartment.
How To Make The RV Sewer System Work Better
The black tank which collects solid waste then to be the most problematic as they can become a source of odor. To prevent this, you will need lots of water along with an effective toilet treatment.
This enables the tank, and nature, to do their work. Having too little water, will cause the solids to pile up on the bottom of the tank and they can accumulate to the point where they prevent complete flushing of the tank, which creates a nasty mess and repairing will cost you a lot.
When bringing out your RV from storage you should always start with a flushed tank and then add a couple gallons of water along with a preferred toilet treatment.
Do try to make use of homemade concoctions in the tank as mixing the wrong chemicals can damage some components in the waste system, such as valve seals.
Using any chemicals that isn’t designed for RV holding tanks can create hazardous and even deadly gases, which can cause system damage and also affect the septic systems tied to dump stations.
Keep in mind that you need to add plenty of water to the toilet each time solids are introduced, and before emptying the tank ensure that there is plenty of water in the black tank.
How To Maintain The RV Septic Tank
- When a septic tank is properly maintained it should last up to 30 years. Here are some noteworthy maintenance tips for your septic tank.
- An RV or heavy machinery should not be driven above the septic tank as that may cause lots of damage to the septic tank and pipes.
- Ensure to regularly check the sludge depth to determine when you should carry out the next cleaning
- Regularly add biological additives to help improve the efficiency of the system
- Avoid making use of chlorine, antibacterial soaps, or any other commercial cleaning compounds as they can kill the helpful bacteria present in the tank
- Trees should not be planted near the septic tank because their invasive root systems can cause great damage to the septic tank
- Soil should not be compacted over the drain field area as the soil needs to be sufficiently aerated for the aerobic bacteria to treat the wastewater before it goes into the soil
Conclusion
The fact that a RV park sewer system is not used uniformly across the year affects the rate at which bacteria die and reproduce inside the septic system.
Due to the large amount of toxic substances that is dumped from different RV holding tank into the sewer system, it needs to be properly maintained so that it can serve its purpose for a long time.
So, if you have been wondering how does an RV park sewer system work hopefully this article gives you a clear insight.